Maximize clarity and quickly communicate key details by automatically adding watermarks featuring your company logo, timestamps, and more to your jobsite photos.
Customize watermark content
Choose what information to include from the following options so watermarks provide the best clarity and context:
Company logo
Company name
Project name
Timestamp
GPS coordinates
Auto-generated location
You can also select whether watermarks appear in the top right or left corner of photos, or the bottom right or left corner.
Enable watermarks by project or by project template
Enable watermarks for individual jobs or across all projects using the same template.
At the project level
If you’d like to test out photo watermarks on a specific project, access that project through Raken’s web app. Then follow these steps:
Select Settings from the project menu
Select Photos from the Setting drop down options
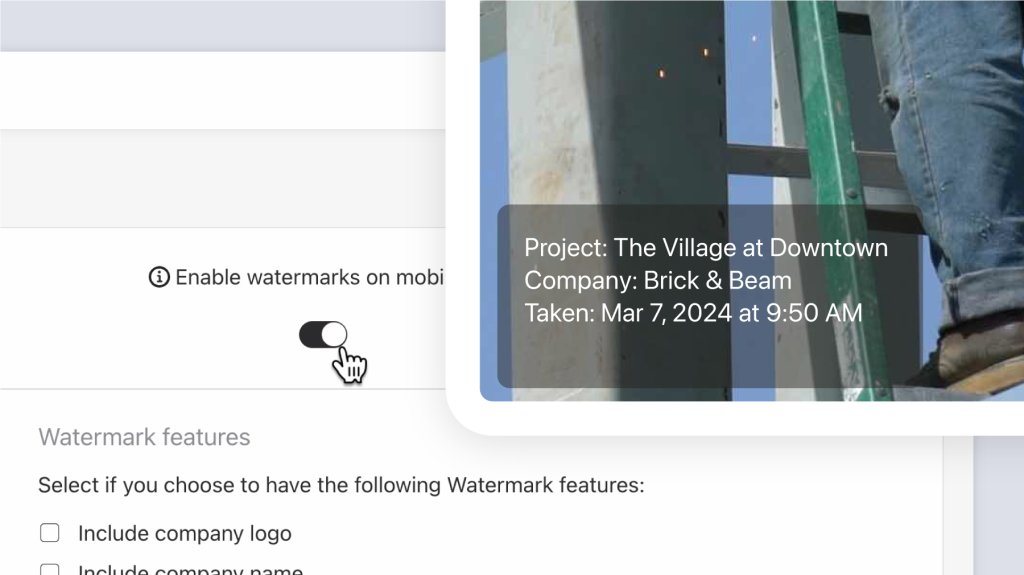
Click the toggle button to enable custom watermarks on mobile photos
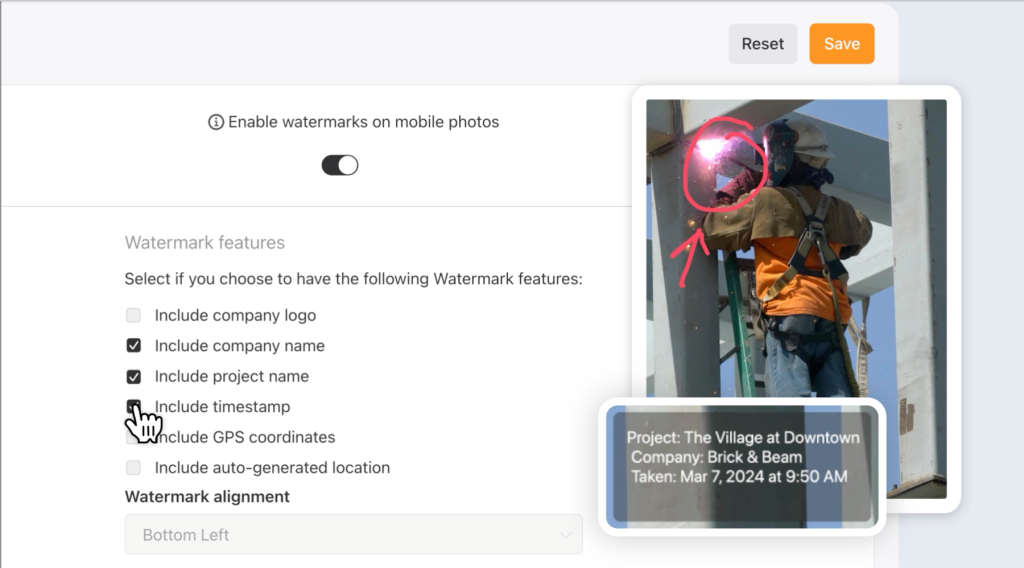
Review the options and check off which information you’d like watermarks to include
Choose the alignment of watermarks from the drop down menu
When finished, click the orange Save button at the top right hand corner of your screen
Watermarks will now be included on all photos you capture in Raken for that project.
By project template

Easily apply watermarks to all photos across projects that use the same project template. To edit your project templates:
Select Company from the left-hand menu of our web app
Select Project templates from the submenu
Select the template for which you would like to enable photo watermarks (or create a new one)
On the template options screen, choose Watermark from the left-hand menu
Click the toggle button to enable custom watermarks on mobile photos
Review the options and check off which information you’d like watermarks to include
Choose the alignment of watermarks from the drop down menu
When finished, click the orange Save button at the top right hand corner of your screen
Once you enable watermarks for a project template, all photos captured in projects with that template applied will include the information you selected.
Some features may not be available with your plan—check with our customer success team for more details.